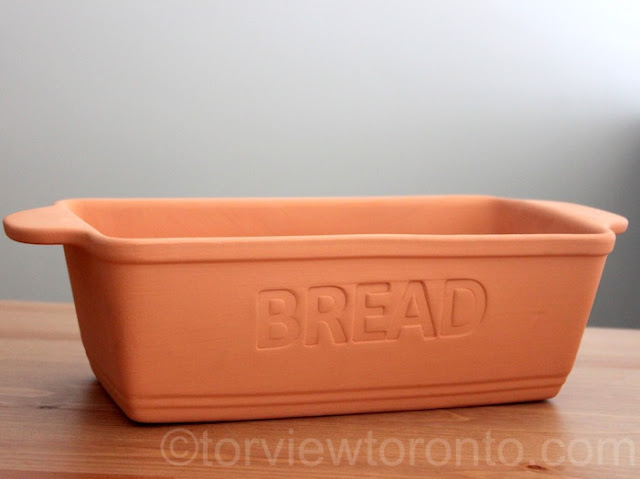
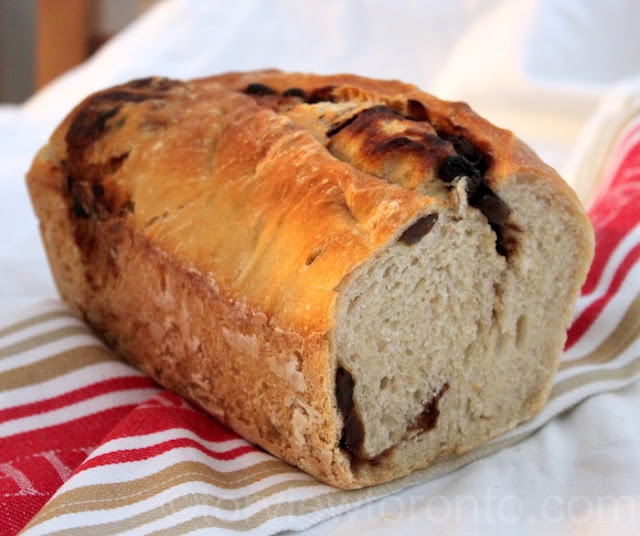
I love using terracotta pots to cook over my gas cooker, as I find it gives the dishes an additional delicious flavour. Other than baking on a clay pizza peel, I haven't baked bread inside a terracotta pan before. I am excited by using the Mason Cash 34cm unglazed Terracotta Bread Form, I can bake bread at home inside a terracotta pan. I found using the terracotta bread form gave the baked bread a delicious flavour, and it smells fabulous.
Prior to using this terracotta pan for the first time, we have to season it. I found the instructions that came with the pan to be helpful with this process.
I also found that I needed to be a little more patient for the bread to cool down in the pan, so it would come out easily. Cleaning the pan was easy because we simply have to soak the pan in water and wash it by hand. After washing and letting it air dry, I coat it with oil and store it. I found the techniques and tips mentioned on the Mason Cash website helpful. I have experimented with a variety of different variations, fillings, and the amount of dough, and found that if I put about 2 lbs of dough we can get a beautiful loaf top.
I also found that I needed to be a little more patient for the bread to cool down in the pan, so it would come out easily. Cleaning the pan was easy because we simply have to soak the pan in water and wash it by hand. After washing and letting it air dry, I coat it with oil and store it. I found the techniques and tips mentioned on the Mason Cash website helpful. I have experimented with a variety of different variations, fillings, and the amount of dough, and found that if I put about 2 lbs of dough we can get a beautiful loaf top.
When baking bread, I also like using the Eddington's Banneton Bread Proving Basket. This cane ring formation basket allows me to make standard shape Artisan bread with rippled imprints on it. I like that the pattern gives the bread a French style Artisan crust. It is mentioned on the product that the cane material in this basket helps retain and absorbs warmth, while providing a consistent shape and texture to ensure the formation of a healthy crust, as it controls moisture conditions on the surface of the dough.
One thing, I didn't like was cleaning the basket because it is hard to remove all the flour from it and we need to make sure it is clean before storing it to avoid growth of mold. I found this video helpful in showing us how to use the banneton properly. Before using the banneton, mist spray and cover it using a cup of flour and make sure all the sides are completely covered with flour. Shake off the excess and let it dry. When you are ready to use, flour it again, and remove the excess flour before placing the dough with the seam side of the bread facing up.
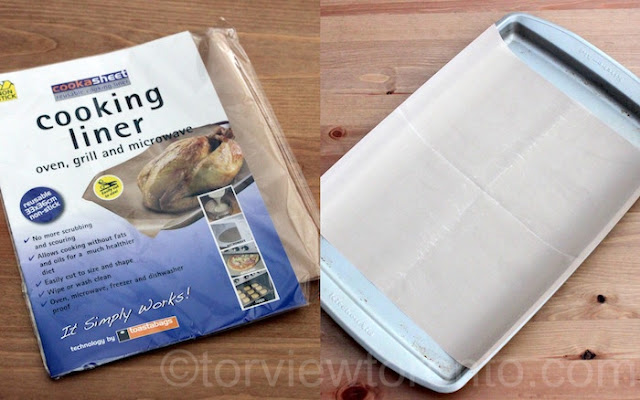
I found using the Planit non-stick and reusable 33x26cm cooking liner was much better compared to using the parchment paper. I find when I use the parchment paper and do not grease it well, it usually sticks to the bottom of baked bread and does not come off easily. I also like that this liner is more eco-friendly, as I can use it over and over to either cook or bake in the oven, grill, microwave, and fry. We can cut the liner to the size we want to fit any pan. It is easy to wipe or wash this liner by hand or place it in the dishwasher. The best thing is that the liner is non-stick so we do not need to grease it.
I think baking bread at home is a rewarding experience, and having the right tools can make the experience fun. I have a couple of go to recipes, Artisan Bread from the in five minutes a day book and this no-knead bread recipe because it is easy, quick and makes delicious bread.
For this recipe I used
1 1/2 tbsp yeast
1 1/2 tbsp salt
3 cups luke warm water 100F
6 1/2 cups of flour
cornmeal to put on the bottom
flour for dusting
I like to dissolve the yeast with about 1/4 cup of the 100F water and let it stand for about 5 minutes before I incorporate everything into a plastic bucket with a wooden spoon. Just make sure that the dough is wet, and there are no flour spots. Let it stay on the counter to rise for about 2 hours. This dough is ready to be used for baking or to be stored in the fridge for up to two weeks to use as needed.
For the terracotta loaf pan...
I cut out about 2 pounds of dough and placed it on a lightly floured surface. I flattened it with my fingers and tightly rolled it to the length of the loaf pan and placed it inside the oiled and floured terracotta loaf pan. Do not knead or work the dough with too much flour, the dough will be sticky so go light on the amount of flour you use. During this process you can add fillings if you want. I left it for a little more than an hour to rise. Before baking the bread, us a knife and slash the top of the bread and mist the top of the bread with water.
Leave a broiler tray on the bottom rack of the oven. Preheat the oven to 450F. Bring a pot of water to a boil and when you place the bread in the oven, quickly pour about a cup of water on to the broiler tray this mist is important to get the crust. Close the oven door and do not open it for at least 15 minutes.
Bake the bread in the middle of the oven for about 30 to 35 minutes until the top will be golden brown.
If you are using the Eddington's Banneton Bread Proving Basket and want to make Artisan bread...
Put an oven proof pot inside the oven and preheat the oven to 450F. Turn the bread on to the Planit non-stick liner and place it inside the pot after it preheats. Bake for 30 minutes with the lid on and then bake for about 20 to 30 minutes without the cover until the top is golden brown. Take the pot out of the oven and remove the baked bread from the pot and let it rest for a few minutes before cutting into slices.
You can also use this delicious homemade bread to make desserts and snack like french toast and bread pudding.
For the terracotta loaf pan...
Bake the bread in the middle of the oven for about 30 to 35 minutes until the top will be golden brown.
Put an oven proof pot inside the oven and preheat the oven to 450F. Turn the bread on to the Planit non-stick liner and place it inside the pot after it preheats. Bake for 30 minutes with the lid on and then bake for about 20 to 30 minutes without the cover until the top is golden brown. Take the pot out of the oven and remove the baked bread from the pot and let it rest for a few minutes before cutting into slices.
You can also use this delicious homemade bread to make desserts and snack like french toast and bread pudding.
All rights reserved on photographs and written content Torviewtoronto © 2010 - 2016 unless mentioned. Please Ask First


Sounds great and I like cooking with terracotta also. Need to find this item! Your bread looks delicious and I can imagine the aroma as it baked.
ReplyDeleteDelicious and the pieces wonderful, kisses
ReplyDeleteSofía
for sure its much better than using plastic forms.
ReplyDeleteI love that teracotta bread pan from where you bought it. Love the freshly baked bread too.
ReplyDeleteWonderful bread! I love my proving baskets too.
ReplyDeleteThe bread looks awesome. Thanks for the info!
ReplyDeleteInteresting post,i love bread !
ReplyDeleteThis is so neat! I've never used proving baskets!
ReplyDeleteThis looks divine
ReplyDeleteI didn't realize there were so many products to help with bread-making. Thanks for explaining them.
ReplyDeleteLooks great and thanks for the tips!
ReplyDeleteNow I'm seriously craving some fresh bread...I can almost smell it! Thank you for the tips and sharing different techniques!
ReplyDelete