Gingerbread cookies


3 cups flour
3/4 tsp baking soda
1/2 tsp salt
2 tsp ground ginger
1 tsp ground cinnamon
1/4 tsp ground cloves
1/4 tsp ground nutmeg
1/2 cup unsalted butter at room temperature
1/2 cup sugar
1 egg at room temperature
2/3 cups molasses

We can use a paddle attachment in the stand mixer or hand mixer to make the dough.
Beat butter till it is creamy, add sugar and beat till the mixture is light and fluffy.  
Add the egg and beat.  
Spray the container with oil spray before measuring molasses so it doesn't stick to the measuring cup.  Then add the molasses to the mixture and combine.
Add the sifted dry ingredient 1/3rd at a time to the wet mixture.  After adding and mixing all the flour, gather the dough into a ball and cut it into two parts before covering it with a plastic wrap.  Leave the dough in the fridge to chill overnight or until it is firm so it can be easily rolled.

Flour the surface, rolling pin, cookie cutters and hands well with flour and roll the dough about 1/2" thick.  Keep turning and lifting the dough so it doesn't stick.
Prepare a tray with parchment paper and butter before placing the cut shapes.  Space about 1"between the cookies and leave the tray in the fridge for about 10 minutes before baking.  Bake in a preheated 350F oven for 8 to 10 minutes.  The cookies should barely brown around edges if baked too much it will become too crispy.  Cool completely on a wire rack before decorating.
The cookies will stay well covered for up to two weeks.  This Gingerbread cookies recipe is adapted from Joy of Baking.  Here is how my children helped bake and decorate these cookies.  
All rights reserved on photographs and written content Torviewtoronto © 2012 unless mentioned. Please Ask First

Holiday gift packaging ideas and festive coffees from Dunkin Donuts

Dunkin Donuts packaged coffee will have their new gingerbread cookie flavoured coffee and other seasonal varieties of coffees such as pumpkin spice and mocha mint available for a limited time to celebrate this festive season.
Select bags of Dunkin Donuts seasonal coffees include paper gift tags that make it easy for us to take it as hostess gifts or holiday treats.

Dunkin Donuts has partnered with Cindy Hopper, a craft blogger to come up with these creative gift wrapping ideas.
  • Let the gift and wrapping compliment one another. i.e. place a bag on gingerbread cookie coffee from Dunkin Donuts in a cookie jar, or serve Mocha Mint with a favourite chocolate bar.
  • Make packaging playful and add a small toy i.e. jump rope as ribbon or jingle bells to the top of the gift.
  • Use blown up balloons or colourful tissue paper to make it eye-catching when the recipients open their package.
  • Use palin paper and put prints, or use newspaper comics, wallpaper scraps or even pages from an old atlas or map to make a memorable gift wrap.
  • Add fresh flowers, shells, misletoe when wrapping the gifts.
  • Instead of cardboard box use decorative tins, hat boxes or fruit crates.
  • Focus on the gift tag and use items like recipe cards, lugagae tag or coasters to identify the gift recipients.
Disclosure: This is a sponsored post.  All rights reserved on opinion of the written content Torviewtoronto © 2012 unless mentioned. Please Ask First

Milk cakes from the Bengali Five Spice Chronicles

This recipe for milk cake or kalakand is from the book Bengali Five Spice Chronicles.  My family enjoyed the flavour of this delicious dessert, which as the author mentions is a cross between cheesecake and milk fudge.  
1 can (14oz) evaporated milk
1 1/2 cup ricotta cheese
3/4 cup milk powder
3/4 cup sugar
2 tbsp ghee or clarified butter + 1/2 tbsp for greasing the dish
1/2 tsp cardamom powder
3 tbsp coarsely chopped pistachios


Put the evaporated milk, ricotta cheese in a pan and bring to a simmer.  Continue cooking the mixture on low heat for about 20 minutes, stirring it frequently until the mixture thickens considerably.

Add the milk powder, sugar and continue cooking until the mixture has a soft fudge-like consistency for about 20 to 30 minutes.
Mix in the 2 tbsp ghee and cook for another 3 to 4 minutes.
Grease an 8" or 9" dish and pour the cheese mixture.  Sprinkle the cardamom powder and pistachios over the mixture and let it cool.  I left it in the fridge to solidify before cutting the cake into 2" squares, we can also cut into any desired shape before serving it cool.
This book Bengali Five Spice Chronicles is written by Rinku Bhattacharya.  The book explores the cuisine of Eastern India and has over 180 recipes that are seperated into 13 parts such as rice & breads, lentil, vegetarian, egg dishes, fish, poultry, chutneys, drinks, snacks, sweets etc.  The book is full of delicious recipes and there are a few pictures of the dishes in the middle of the book. 
I like the explanations given by the author about different spices/seeds.  I also liked reading about the author and her influences that led to write this book.  

I find it interesting to read about other cultures and traditions, so I enjoyed reading the history of Bengali cuisine in the beginning of the book.  I thought it was interesting that Bengalis eat rice with different vegetables and then eat non-vegetarian food such as fish in the end, because we tend to eat it together or in the opposite way by eating non-veg first then with rice and vegetables :) 


Giveaway:
If you are in Canada or US and would like to win a copy of this book Bengali Five Spice Chronicles please enter through the rafflecopter below before December 15th.
Update: The winner is Tina


All rights reserved on photographs and written content Torviewtoronto © 2012 unless mentioned. Please Ask First

Art Institutes Passion for Fashion 2013 competition

Dear friends, although this post is not about food it will benefit many of you as it is a fun opportunity for high school seniors to showcase their creative ideas and get an opportunity to earn a scholarship towards a hands-on fashion education.
The Art Institutes Passion for Fashion Competition 2013 allows teens that love fashion and style to earn a tuition scholarship.  The VP of Academic Affairs for The Art Institutes says that this competition serves as a vehicle where aspiring fashion professionals can express their zeal for an industry that is both dynamic and rewarding. 
Passion for Fashion Competition is open to legal residents of the fifty United States, the District of Columbia, Puerto Rico, and Canada (excluding Quebec) who are full-or part-time high school seniors scheduled to graduate in 2013 with a minimum 2.0 cumulative grade point average.  Entries must be submitted here at The Art Institutes Scholarship Competition site before February 14, 2013.   
This competition has two categories:
1. Fashion Design - where entrants submit three original sketches of an evening wear garment
2. Fashion Marketing & Merchandising and Retail Management - entrants submit a fashion trend forecast board

Entrants must choose an Art Institutes school that they wish to represent in this competition, and later attend.  Local competitions will take place at each participating Art Institutes school throughout U.S. and Canada.  The winners for both these two categories will earn a $3,000 tuition scholarship to The Art Institutes school they represent in the competition.  Local first place winners in each category will move on to the national competition where the national grand prize winners will be chosen by a panel of fashion industry professionals.   


The two national competition grand prize winners will each earn... 
  • a half-tuition scholarship to attend an Art Institutes school, 
  • receive a VIP trip to New York City, 
  • participate in a “meet and greet” atSeventeen magazine’s New York City offices, 
  • have lunch with a Seventeen Style Pro, 
  • receive a $500 shopping spree at DKNY with the Style Pro, 
  • and a $500 gift card to shop anywhere in the Big Apple.
More information about the competition is here.  

Disclosure: This is a sponsored post.  However all rights reserved on opinion of the written content Torviewtoronto © 2012. Please Ask First

Pineapple cheesecake

Crumb
1 tbsp butter
3/4 cup graham wafers crumbs

Prepare a 8" springform pan with nonstick cooking spray.
Combine the softened butter and crumbs, then press into the bottom of the pan and freeze until the filling is ready.

Filling
1/4 package light cream cheese softened
1 cup cottage cheese
1 1/2 cup sugar
1/4 cup cornstarch
4 egg whites
1 tsp vanilla
14 oz crushed pineapple can well drained
1 cup drained yogurt*

*Drain the yogurt overnight in the fridge by placing it in a sieve lined with a paper towel over a bowl.
Combine and beat the cream cheese and cottage cheese until it is smooth.  Then beat in the sugar and cornstarch.  Add the yogurt and then stir in the crushed drained pineapple.  
Pour the batter into the frozen crust.

Bake in a 325F preheated oven for about 75 minutes until the sides are nicely brown and it is puffy in the centre.  
Turn the heat off and leave the oven door open halfway to let the cheesecake cool for about 1 to 1 1/2 hours inside the oven.  Then chill the cake for at least 4 hours or overnight before serving.
This recipe is adapted from a magazine clipping, not sure about the name of the magazine.

All rights reserved on photographs and written content Torviewtoronto © 2012 unless mentioned. Please Ask First

Black and White Wednesday #59 Event

I am happy to announce that I will be hosting the Black and White Wednesday #59 this week until November 24th.  This inspiring event was started by Susan from Well Seasoned Cook.
This picture of the tomatoes from our garden was taken on Monochrome mode.
Please link your entry posts for the event using the linky below and I will add the pictures manually or send the entries by email and I will add it.  
Please make sure to add the links to this post and Cindystar's BWW page.  Using this logo is optional.
The twitter hashtag for the event is #BWFood.  Black and White Wednesday #60 will be hosted by Haalo of Cook almost anything.
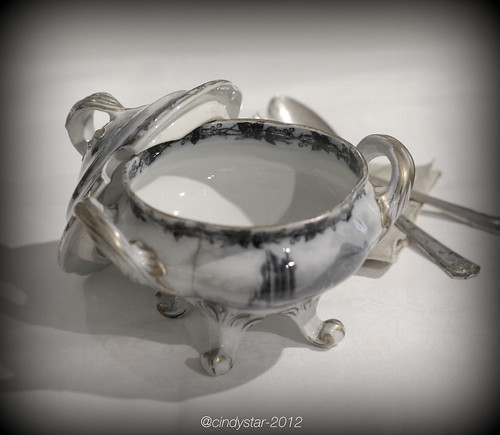
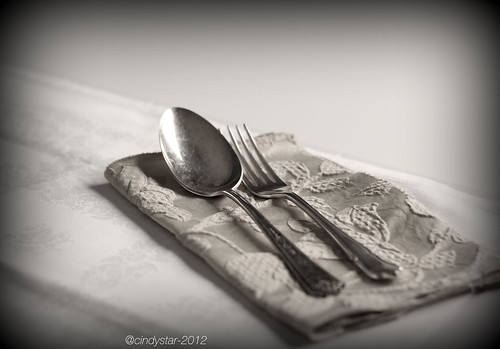
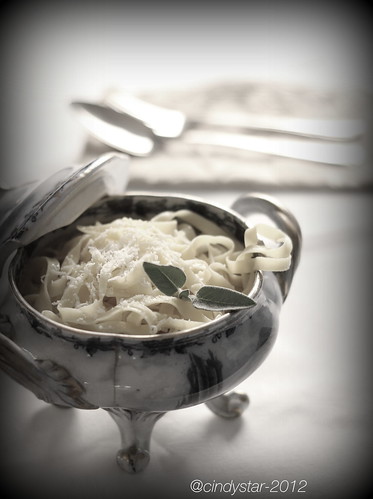
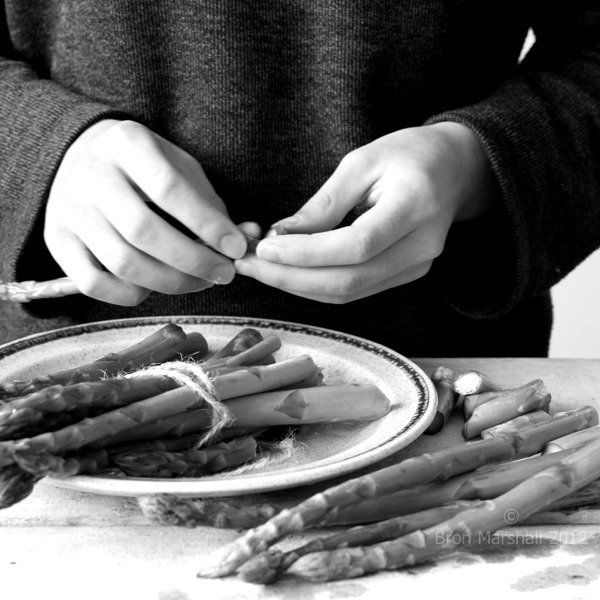
1.Spoons 2.Tomatoes from our garden 3.Breakfast 4.Berries 5.English style bone china soup tureen 6.Old fashioned napking and silver cutlery 7.Ready to shoot 8.Ready to shoot in dark 9.Meyer lemon tree 10.Bathing the microwave 11.Snapping asparagus 12.Lentils 13.Farm beauty
All rights reserved on mentioned photographs and written content Torviewtoronto © 2012 unless mentioned. Please Ask First

Mysoor lentil fritters

2 cups of split mysoor or masoor dal or yellow/orange lentil
1/2 cup cleaned shrimp chopped 
2 tbsp onion sliced finely
1 tbsp curry leaves chopped
1 to 1/2 tsp chillie flakes to preference
1/2 tsp salt
oil 2" high to fry

*Shrimp can be omitted if you want to make it vegetarian.

Wash and soak the lentils for about an hour or more. Grind the dal coarsely without any water, don't grind well because it would be hard to form the shape to fry. 
Add salt, chillie flakes, onion, curry leaves and shrimp to the ground dal and mix.  Make ball shapes or use a tbsp full of mixture to drop into the hot oil; it is optional to make a donut shape hole in the middle for these fritters.
Deep fry in hot oil (about 360F), the fritters should not brown too fast so keep the heat in medium high heat and fry until the fritters are golden brown.  Serve hot on its own or with hot sauce.  These savoury fritters would be perfect for brunch, snack or as a savoury treat for tea time.
All rights reserved on photographs and written content Torviewtoronto © 2012. Please Ask First

Mejadra rice from the fabulous Jerusalem cookbook

Jerusalem cookbook is a fabulously written book filled with  beautiful pictures and delicious recipes.  I enjoyed travelling to Jerusalem through this book.  The authors Sami Tamimi is from the muslim east and Yotam Ottolenghi is from the Jewish west. They both have lived in Jerusalem in the 70s and 80s as children and left in 1990 to Tel Aviv, then to London. They both met each other in London and became good friends and business partners. Both the authors feel that Jerusalem is "home" because it defines them. I think many of us call "home" a place that defines us and not necessarily where we live, it is where our hearts find comfort, excitement and joy.  

Jerusalem has a diverse group of people living there from a variety of background, which influences its cuisines.  The authors say when we look at the greater pictures there are lots of similarities in the food that is made and enjoyed in Jerusalem i.e. cucumber and tomato salad, stuffed vegetables, pickles etc...

Throughout Jerusalem they have a common middle eastern hospitality that goes back to the days of prophet Abraham or Ibrahim (Peace Be Upon Him).

The food is what break down the boundaries of conflict that people in Jerusalem have set.  The authors say, "It takes a giant leap of faith... to imagine that hummus will eventually bring Jerusalemites together, if nothing else will."

We have been forewarned by the authors that the recipes are modified to suit the western modern lifestyle as the ingredients are adjusted to availability, less oil and ease of making.  Therefore the recipes may not represent the realities of how the food is really made in Jerusalem.

I liked reading the religious history of Jerusalem that was in the beginning of the book.  The authors say that if people acknowledge the city as part of the "world heritage" and share, accept and coexist then it would be peaceful.  I found the dishes in the book full of flavour and comfort and would really encourage and recommend this book, which is available at bookstores and online.

Here is a comforting rice and lentil meal, known as Mejadra that we enjoyed.  This recipe is adapted from the book as I changed it a little bit because I can easily find ready-made fried onions at the Indian/Middle Eastern section of the grocery store.


1 1/4 cups green or brown lentil

1 1/2 cup crispy fried onions*
2 tsp cumin seeds
1 1/2 tbsp coriander seeds
1 cup basmati rice
2 tbsp olive oil
1/2 tsp turmeric
1 1/2 tsp allspice ground
1 1/2 tsp cinnamon ground
1 tsp sugar
1 1/2 cups water
1/2 tsp salt
1/2 tsp or more to taste pepper freshly ground


*In the book they thinly slice 4 medium onions.  Then coat the onions with 3 tbsp flour and a tsp of salt before frying it in a cup of hot oil over medium high heat, for about 5 to 7 minutes until the onions are golden brown and crispy.


Next time, I will reduce the lentil by 1/4 cup and lightly crush the cumin and coriander seeds before toasting.

Place the cleaned, washed lentils in a small pan and cover with plenty of water then bring to a boil and cook for 12 to 15 minutes until the lentil are soft but still have a little bite.

In a saucepan over medium heat toast the cumin and coriander seeds for about a minute or two.  Then add the rice, olive oil, turmeric, allspice, cinnamon, sugar, salt and pepper.  Stir to coat the rice with the oil then add the cooked lentil with the water.  I made sure there was a 1" of water after putting the rice into the pan.  When it comes to a boil, cover with a lid then simmer over low heat for about 15 minutes.

Remove from heat, lift off the lid and quickly cover the pan with a clean tea towel and seal tightly with the lid and set aside for 10 minutes.  Add half the fried onions to the rice and stir gently with a fork.  Pile the mixture of rice and lentil on to the serving platter and top with the rest of the fried onion.  Serve warm with yogurt or raita.


All rights reserved on photographs and written content Torviewtoronto © 2012 unless mentioned. Please Ask First

Ricotta cookies and Lidia's favourite recipes cookbook giveaway

This recipe for Ricotta cookies or Biscotti di Ricotta is adapted from Lidia's favourite recipes cookbook.    I halved the original recipe to make about 18 cookies, if you make the full recipe with the quantities below it will make about 3 1/2 dozen.  I didn't add vanilla extract as I used vanilla flavoured sugar.  I also didn't coat the cookies with the suggested 2 cups of icing sugar mixed with 1/4 cup fresh lemon juice because it was sweet enough for us without the confectioner's sugar.

2 1/4 cup flour
1 tsp baking powder
pinch of salt
1 cup sugar
1/2 cup butter at room temperature
2 eggs
1 cup fresh ricotta drained
1/2 tsp vanilla extract
zest of one lemon (I think this is optional)

Mix the flour, salt and baking powder and leave aside.
Beat the sugar with the butter until fluffy and light, then add the eggs one at a time and beat well.  Add the ricotta and lemon zest if using and beat only until it combines.  Add the flour mixture and beat in low speed only till it incorporates, do not over mix.

In a cookie sheet pan with a baking sheet place a tbsp on dough about an inch apart and bake at 325F for 20 to 22 minutes until the cookies are puffed and golden.  Halfway through the 20 minutes of baking rotate the pan ones.  
After it bakes cool the cookies on a wire rack.  When the cookies are completely cool enjoy.  I found the cookies soft and delicious.
Lidia's favourite recipes cookbook has 100 fool proof Italian dishes that has got many ravings, which she has revised and updated to make it more concise and clear with information such as affordability, seasonality and nutritional value.  Looking through the book, I found the recipes easy to follow. The book has lovely pictures for some recipes, although I would have liked a picture for all the recipes.  
The content is separated into appetizers, salads/soups, sandwiches/pizzas, primi, sauces, vegetable sides, seafood, mean/chicken and desserts.  I wish the author included substitutions for alcoholic ingredients :) because there were a lot of recipes that use alcohol, which prevents me from trying the recipes.  

Giveaway
If you would like to win this book, please enter through the rafflecopter below.  The giveaway is open to people in Canada and US ends on November 20th.
Update: The winner is Eri
a Rafflecopter giveaway
All rights reserved on mentioned photographs and opinion of the written content Torviewtoronto © 2012 unless mentioned. Please Ask First

Plum crumble cake

plum crumble cake
For the cake
2 cups flour
3/4 to 1 cup vanilla infused sugar *
2 eggs
1 tsp baking powder
3/4 cup butter
plums to cover the cake


*It depends on the sweetness of the plum, I used about 8 plums with pit removed and cut in half.

Melt the butter and cool.  Sift flour and baking powder together, then add the sugar and eggs.  Rub together using the fingers then add the melted butter and form a dough.  Cover the smooth dough with a plastic wrap and cool in the fridge for an hour.


For the crumble

3/4 cup flour
1/4 cup sugar
1/4 cup butter
1 1/2 tsp cinnamon ground
Combine everything by rubbing the ingredients between the fingers to get a coarse texture.


Prepare a 13"x9" glass baking pan with baking paper and press the chilled dough evenly.  Press the tops with the halved, pitted plums.  Cover the cake with the crumble.  Bake the cake at 350F for about 40 to 50 minutes.  When the cake is tested with a skewer and it comes out clean, remove from the oven, cool and then cut to serve.

plum crumble cake
This recipe is adapted from here.
All rights reserved on photographs and written content Torviewtoronto © 2012 unless mentioned. Please Ask First